I am very detailed tutorial where i will show you how to create a greeting card for Christmas and New Year. This Photoshop tutorial is very simple but the result looks so beautifull.
Final Image Preview

Step 1
Create a new document with size of 800 x 600 pixels and fill it with black color.


The picture will be similar to mine:


We are finished with creating snow; let’s move to the next step.


Final Image Preview

Step 1
Create a new document with size of 800 x 600 pixels and fill it with black color.

Step 2
Now I would like to create abstract snowing on the picture. We can do it by using the Pen Tool. But before we can start, we have to change some presets of the Brush Tool which we will be using in the future. Select the Brush Tool, a soft round brush about 15 pixels and opacity at 61%.
Then click the button “Toggle the Brushes Palette” on the Options Bar to open brush preset window or go to Windows > Brushes. Here we can see a couple of presets.
Step 3
Set foreground color as white (#ffffff). Create new layer, after that select Pen Tool (you need to make sure you are working with Paths instead of Shape Layers). Draw out one straight line using paths:

Click on start point to close path. Then right-click and select Stroke Path:

A little dialog box will appear as in the screenshot. Choose Brush and make sure there is a tick next to Simulate Pressure. This is important as it will give your line tapered ends which will make it.

The picture will be similar to mine:

Step 5
Next right click again and select Delete Path. Then add more lines on the same way.

Step 6
You can change brush size, so the picture will look more interesting:

Step 7
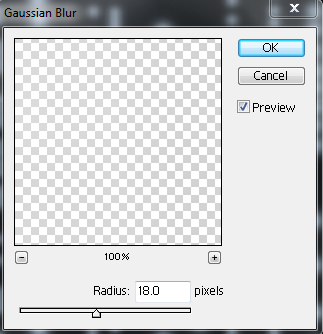
Duplicate current layer (Ctrl+J) and apply Filter > Blur > Gaussian Blur with next parameters:

Step 8
We are finished with creating snow; let’s move to the next step.
Create new layer above, then select the Gradient Tool and fill this layer with Spectrum linear gradient (this is one of standard Photoshop gradients).

After thart change layer mode to Soft Light for this gradient layer and you will see total difference in coloring.

Step 9
Before we start adding text, we have to make some dark mat to divide text from the background. For this effect, select the Rectangular Marquee Tool to create selection similar to mine on screenshot below and fill this selected area with black to transparent linear gradient on the new layer.


Step 10
Remove selection with Ctrl+D. Now is time to add the text. Get out the Horizontal Type Tool and write out some text with white color in two lines. For this Photoshop tutorial I´ve used Arial (60 pt, Normal, Black, Crisp) font which is one of standard Windows fonts.

Step 11
Then we have to add the year, but I want to put it in a small box. Use the Rounded Rectangle Tool (Mode: Shape layers, Radius: 5px) to create small box above the text with white color also.

Step 12
After that select the Horizontal Type Tool again and add the year with the same font (Color: Black, Size: 16 pt, Black, Crisp).

Step 13
Now you can add one more text line:

Step 14
Change opacity for this layer to 40%.
Final Image
We are almost finished with creating our greeting card. The last one thing that we have to add a little bit visible white circles. Select the Brush Tool (Opacity: 20%) and a hard round brush to add different size circles to the greeting card canvas.

No comments:
Post a Comment